

Are you looking for the perfect way to present a complete corporate identity project to your clients? Use this highly realistic, 2-in-1 Free 3D Reception Logo Mockup PSD to place your logo designs in an inspiring, modern office environment. Mocking up your designs helps clients visualize what their brand will look like in the real world, making it much easier to get your concepts approved.
Complete Office Branding: Wall & Desk Mockups in One
When designing a company logo, a single flat presentation can sometimes feel lifeless. What makes this mockup special is that it offers two separate placement options in one file.
You can showcase your branding on the premium 3D background wall, as well as on the front of the marble and wood reception desk! Whether your client is looking for a logo wall design, 3D office lobby signs, or a modern logo for their front desk, this mockup provides a photo-realistic preview.
Features of this Free Office Reception Mockup:
- Dual Smart Objects (2-in-1): Easily place different variations of your logo on both the wall and the reception desk simultaneously.
- High Resolution: Crisp, professional quality perfect for client presentations, Behance, and portfolios.
- Easy to Use: Double-click the Smart Object, drop your logo, and save. The PSD does all the heavy 3D rendering for you.
- Fully Layered PSD: Organized layers allow you to adjust effects, shadows, and lighting to match your brand colors.
- 100% Free: Download and use it for your personal and commercial presentation projects (with attribution).
How to Use the 3D Reception Mockup in Photoshop
Working with this PSD is incredibly simple. Just follow these steps:
- Download and Extract: Download the free PSD file from the button below and open it in Adobe Photoshop.
- Find the Smart Objects: Look at the layers panel for the layers labeled for the “Wall Logo” and “Desk Logo” (Smart Object layers).
- Insert Your Designs: Double-click a Smart Object thumbnail. Drag and drop your transparent logo (PNG or Vector) into the new window, replacing the default text.
- Save and Close: Hit
Ctrl+S(orCmd+Son Mac) to save the Smart Object, then close that tab. - View the Magic: Your logo is now automatically rendered onto the 3D office space with perfect perspective, marble textures, and lighting! Repeat for the second smart object.
Watch the Step-by-Step Photoshop Tutorial
If you are new to Photoshop or want to see exactly how to apply your logos to both the wall and the desk seamlessly, check out our quick video tutorial below.
Join the CreativeAlys Community!
We have many more fascinating videos, expert graphic design tips, and premium-quality freebies coming your way. Don’t miss out—subscribe to our YouTube Channel and join our community of passionate creators!
Credits:
Design by CreativeAlys – Don’t forget to share your creations with #CreativeAlys!
You May Like
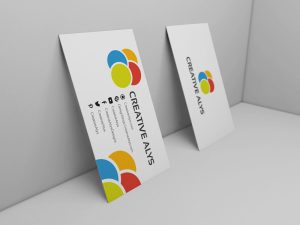
3D Business Card PSD Mockup
Here is another great graphic design resource for all. A very appealing 3D Business Card PSD Mockup to showcase your...
Suggested Pro Downloads


Latest from @CreativeAlys YouTube Channel

70s Bubbly 3D Typography Tutorial | Adobe Illustrator

Flat 2D to 3D Stone Wall in Seconds! ⚡ #shorts #photoshop

How to Use 3D Stone Wall Logo Mockup in Photoshop (in 18 Seconds!) | CreativeAlys

Free 3D Stone Wall Logo Mockup PSD Tutorial | How to Edit & Customize in Photoshop

How to Display Latest YouTube Videos in WordPress (Free, Fast & No API Limits)


Thanks For Sharing……………..
Thanks For Sharing…………….
Thanks for sharing.
Thanks for your nice concept.
Thanks For Sharing……………..
You’re welcome!
You’re welcome!
tnx
thanks good look
Thanks For Sharing
so niceQ
OSM mockups
thank for sharing!
woe
Thanks For Sharing…………….
Thanks
THANKYOU
Awesome mockup!
Thanks For Sharing
You’re welcome!
Thank you so much
You’re welcome!
Thanks dude!
nice
Thanks!
공유감사합니다.
thansk 🙂
You’re welcome!
천만에요!