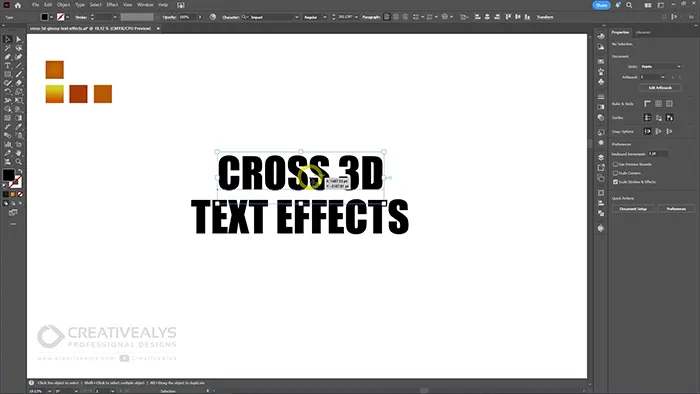
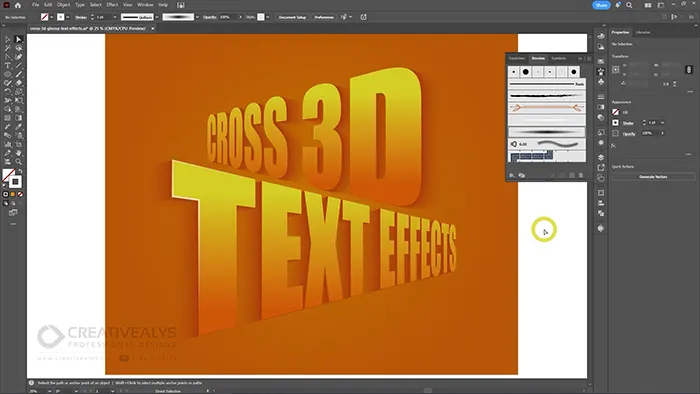
Create stunning typography with this Cross 3D Glossy Text Effect in Adobe Illustrator — a step-by-step video tutorial that transforms simple flat text into a bold, eye-catching 3D perspective design. This effect is perfect for posters, banners, thumbnails, branding visuals, social media graphics, and modern typography projects.
In this tutorial, you’ll learn how to use powerful Illustrator tools such as Envelope Distort (Mesh), Blend Tool, and custom Art Brushes to build depth, gloss, and a realistic cross-perspective 3D look. The method is beginner-friendly, easy to follow, and designed to help you understand how multiple tools work together to achieve professional results.
If you prefer visual learning, watch the full step-by-step video tutorial above. If you’d rather follow written instructions at your own pace, the complete text-based tutorial is provided below.
What You’ll Learn
- Convert flat text into cross-style 3D typography
- Use Envelope Distort for perspective shaping
- Create depth using the Blend Tool
- Apply custom Art Brushes for glossy highlights
Step 1: Create a New Document and Add Text
- Open Adobe Illustrator and create a new document.
- Select the Type Tool (T) and type your desired text.
- Choose a bold font for better depth and visibility.
This allows full control over the text shape.
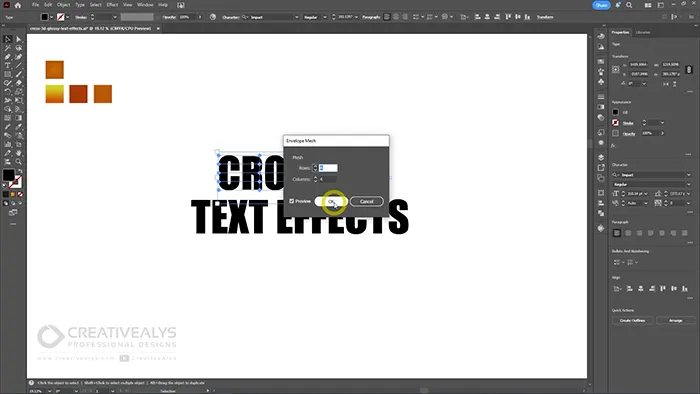
Step 2: Apply Envelope Distort to Shape the Text
- Select the text.
- Go to Object → Envelope Distort → Make with Mesh.
- Use a simple mesh (for example: 4 rows, 4 columns).
This step adds the foundation for the cross-style perspective.
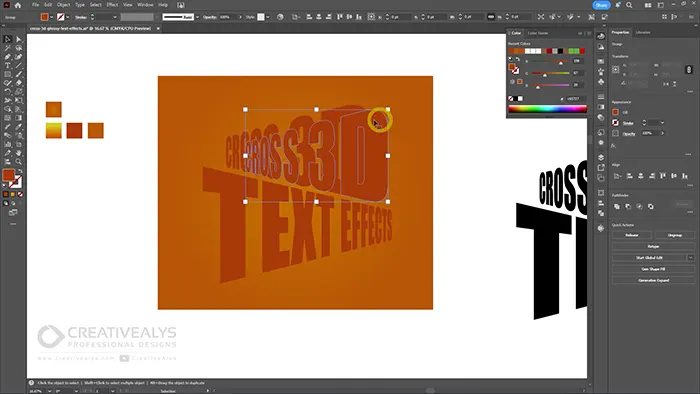
Step 3: Make Text in Cross Perspective Style
- Select the top text.
- Use Free Transform Tool (E)
- With Perspective Distort feature selected, adjust the text to slightly bend and shape the text.
- Do the same with the bottom text and bend it from the opposite side of the top text.
The text is now ready for applying 3D effects.

Step 4: Duplicate and Offset the Text for Depth
- Copy the distorted text and paste it behind (Ctrl + C → Ctrl + B).
- Make another copy of the text and paste it behind the first copy.
- Slightly move the second back copy diagonally to create depth.
These copies will be blended to create smooth depth.
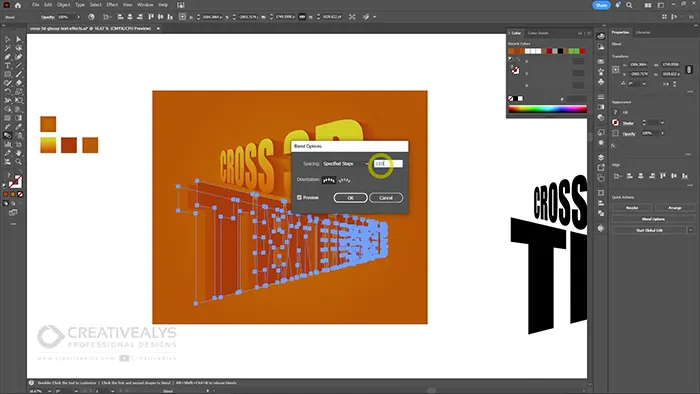
Step 5: Create the 3D Depth Using the Blend Tool
- Select the first copy text and the second copy text.
- Go to Object → Blend → Blend Options.
- Set:
- Spacing: Specified Steps
- Steps: 50–100 (adjust for smoothness)
- Click OK, then go to Object → Blend → Make.
This creates smooth transitions between layers, forming the 3D effect.
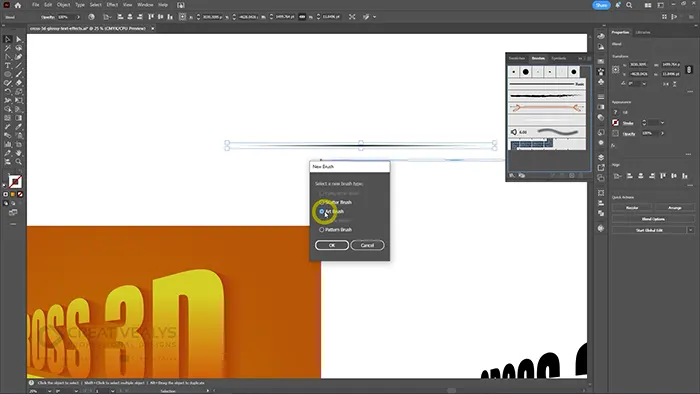
Step 6: Create a Custom Art Brush for Gloss
- Draw a thin horizontal oval shape using the Ellipse Tool (L).
- Create a copy of the shape and scale it down.
- Blend the two Ellipses to form a smooth transition between shapes.
- Open the Brushes Panel and drag the shape into it.
- Choose Art Brush and adjust the direction if needed.
This brush will be used to add glossy highlights.
Step 7: Apply Glossy Highlights
- Use the Direct Selection Tool (A) to select specific anchors of the text along the 3D edges.
- Copy the selected anchors and Paste in Front (Ctrl + C → Ctrl + F).
- Apply the custom Art Brush to these paths.
- Reduce opacity, stroke weight and adjust blending mode (optional) for realism.
These highlights give the text a polished, glossy look.
Step 8: Add Colors and Final Touches
- Apply gradient fills to the main text for depth.
- Adjust shadows, highlights, and stroke thickness if needed.
- Fine-tune spacing and alignment for a clean finish.
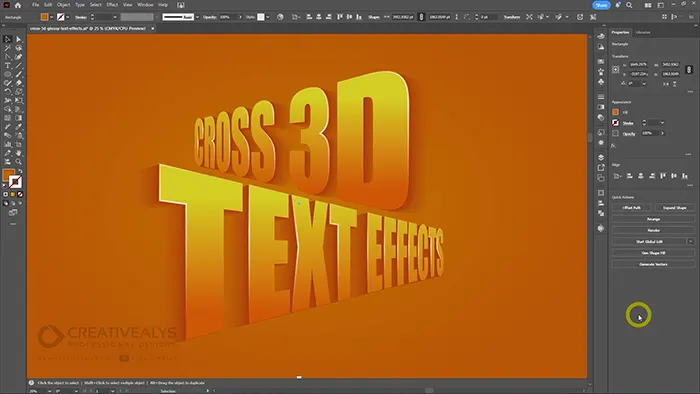
At this stage, your Cross 3D Glossy Text Effect is complete.
Final Tip
Experiment with different fonts, colors, and blend step values to create unique variations of the cross 3D glossy text effect.
Free Download – Illustrator Source Files
To make learning even easier, the complete vector source file is available for free download in Adobe Illustrator AI format. You can study the structure, customize the text, change colors, or reuse the technique in your own projects.
You can watch the video tutorial above, follow the written steps, download the source files, and start creating impressive 3D glossy text effects in Adobe Illustrator today.
If you enjoyed this tutorial, don’t forget to subscribe to the CreativeAlys YouTube channel for more Illustrator tutorials, text effects, and free design resources.
Check out our graphic design freebies section for absolutely free access to valuable design assets that you can use and share in your projects. Browse our premium downloads if you’re looking for even more great and professional resources to enhance your work.
Credits:
Design by CreativeAlys – Don’t forget to share your creations with #CreativeAlys!
You May Like

Flaming Alphabet Vector Pack: Bold and Fiery Letter Designs
Download this bold and fiery Flaming Alphabet Vector Pack for free! Designed to captivate and inspire, the Flaming Alphabet Vector...